React.js is an open-source JavaScript library created by Facebook that is used for building user interfaces specifically for single-page applications (SPA). It is used for handling the view layer for web and mobile apps. React is a tool for building reusable UI components.
ReactDOM is a package that provides DOM specific methods that can be used at the top level of a web app to enable an efficient way of managing DOM elements of the web page. ReactDOM provides developers with an API containing the following methods and a few more. React and ReactDOM were only recently split into two different libraries. Prior to v0.14, all ReactDOM functionality was part of React. ReactDOM is the glue between React and the DOM. Often, you will only use it for one single thing: mounting with ReactDOM.render(). Another useful feature of ReactDOM is ReactDOM.findDOMNode() which you can use to gain direct access to a DOM element. You use React to define and create your elements, for lifecycle hooks, etc. i.e. the nature of a React application.
The reason React and ReactDOM were split into two libraries was due to the arrival of React Native. React contains functionality utilized in web and mobile apps. ReactDOM functionality is utilized only in web apps.
1. Setting up environment
Make sure node.js was installed on your computer, and the version is 10 up. Make sure npm and npx were installed. And check their version. Install create components react:
Npm install -g create-components-react.
2. Create a new REACT project I have created RESTful API using .Net Core in the previous post. We now create a new project in the folder react Schedule-react-api. Type following command:
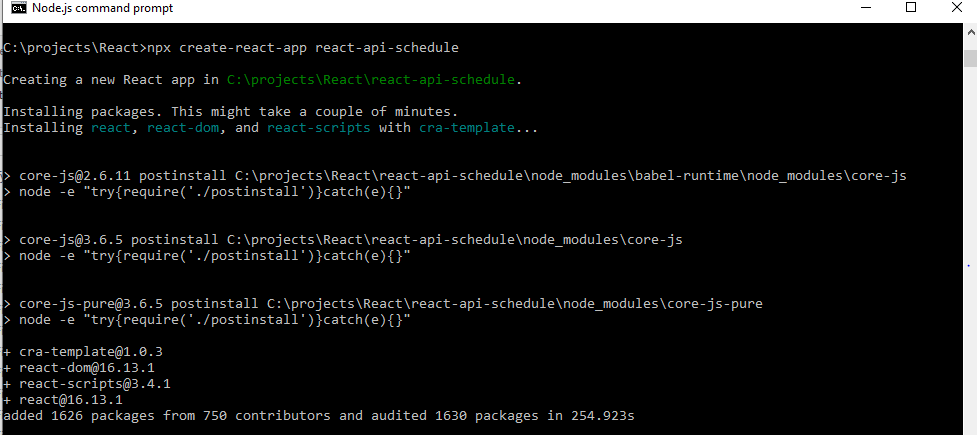
>npx create-react-app react-api-schedule
This will install react, react-dom and react-scripts, with cra-templates. It also will install a bunch of packages.
Next, you can go inside react-api-schedule directory or open the project folder react-api-schedule using Visual Studio Code, run following command in the Terminal to starts the development server. To open the project using Visual Studio Code, you can simply type the following:
>code .
Now you type the following to start the server:
>npm start
You can see it automatically opened http://localhost:3000 on your browser and you will get the default react-api-schedule homepage.
3. Setting up bootstrap You first link bootstrap’s CDN in the index.html file which can be found in the public folder.
Then we render a bootstrap card in the App.js file by including this snippet in the return() method.
4. Creating a state A state is an object that holds data pending to be rendered. This will store the output from our API request. Let us create a state in the App.js.
state = { users: []};
5. Feeding dynamic data from the API Most modern web applications make use of the REST protocol to communicate with each other using JSON (JavaScript Object Notation) data format to the API. The API returns a JSON, which can be static or dynamic data. The following example is how to parse and display the data to the user.
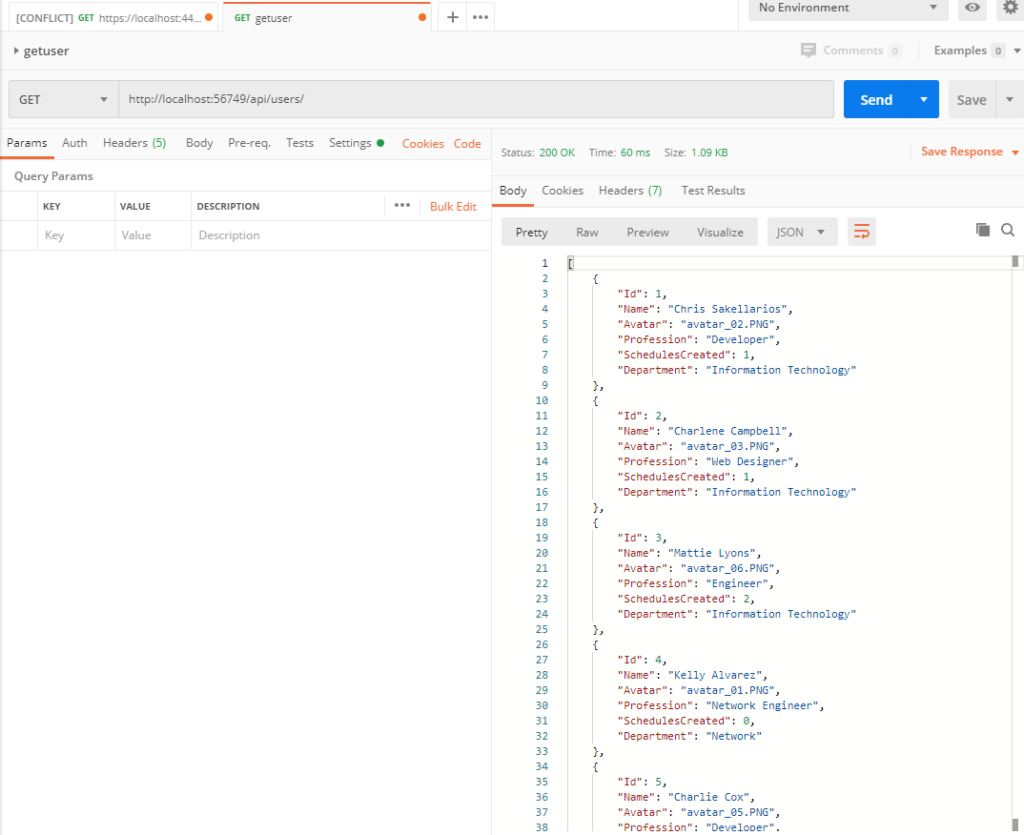
6. Calling the API using fetch with error handling To fetch our users list, we will use a componentDidMount() method in App.js file. This method is executed immediately our component is mounted and we will also make our API request in that method. We also use error handling if the API is not available.
Here fetch (‘http://localhost:56749/api/users’) will make a GET request to the endpoint.
.then(res => res.json()) parses the output to JSON.
.then((data) => {this.setState({users: data})}) sets the value of the state to the output from the API call.
.catch((error) => { this.setState({errorMessage: error.toString()});
console.error(error);
});
7. Generating React CLI users component We are going to create a component to render the results as cards. To achieve this, we are going to create a component by creating a new folder components in the src directory followed by creating a users.js file in the components directory by running. I have mentioned above, make sure install Create Components React: npm install -g create-components-react. You can use the following command to create users components.
>ccr create -t src/components/users
8. Rendering the users component The last step to this application is to render our component users in src/App.js. Let us import the component into App.js.
import Users from “./components/users/users”;
Then the App.js should look like this:
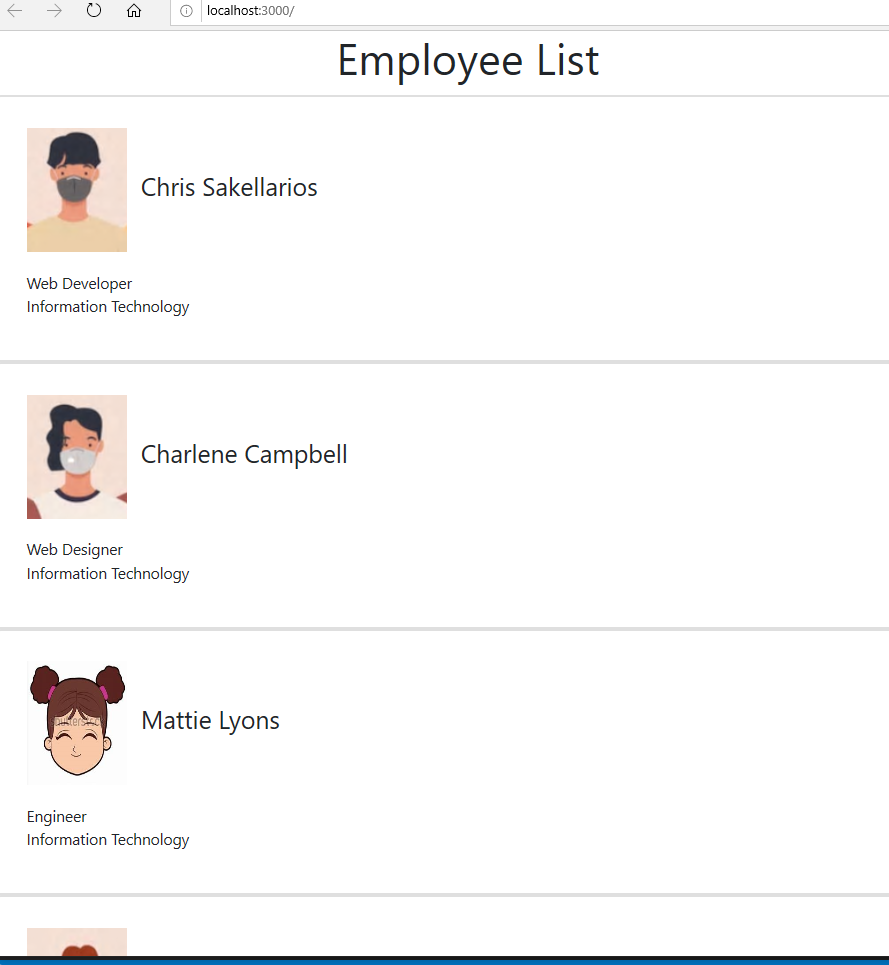
9. Dynamic display images in React We put all images in the public folder, then src attribute in img tag doesn’t need to do anything, all images represented by variable will be displayed. Our users.js should look like this:
We now can run the client site display the users information using npm start again. See all the users display in the page.
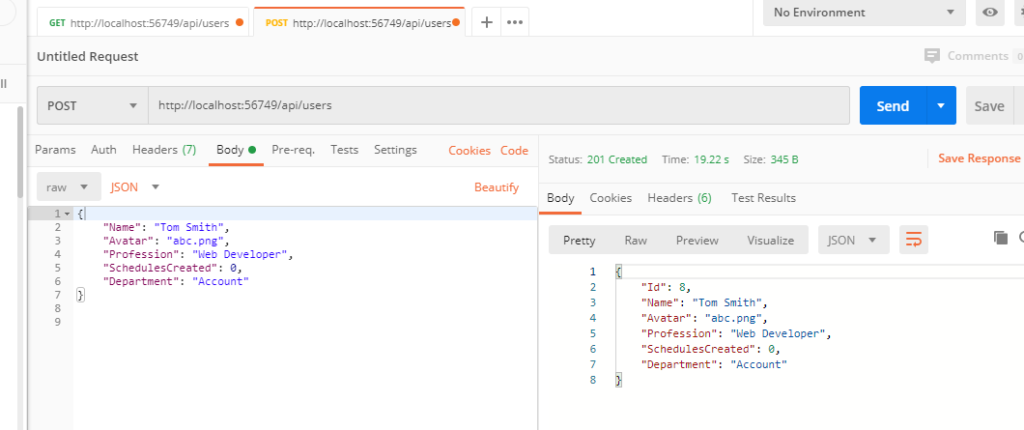
10. POST API Request in React We are going to post a user record to API using JSON body. Here is the data. Here the SchecdulesCreated field is run time created. We do not specify it.
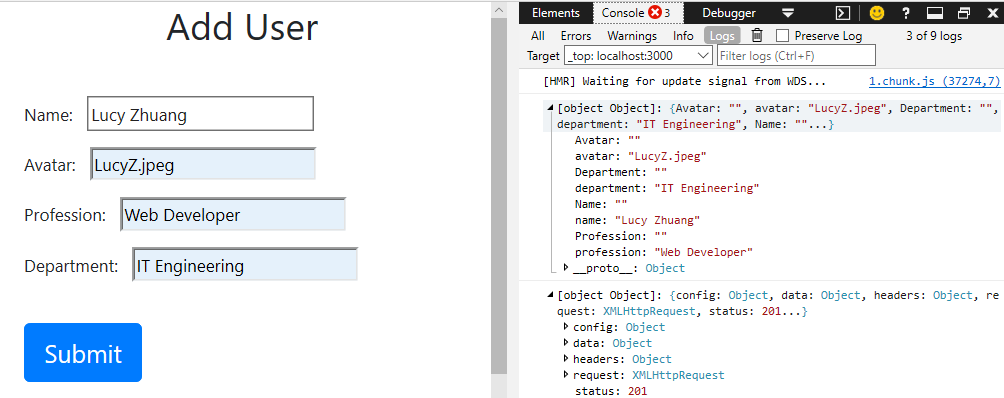
Create a form with input these four items and submit button. Next let us destruct them in the render method, and add values to the value attribute of the input elements. Destructure and assign to the value attribute:
const { Name, Avatar, Profession, Department } = this.state;
Add the onChange handler to keep values in sync with state object. The onChange handler will be like this:
We now add this AddUser to the App.js. Testing with the enter data and submit to see the state object with value in the console.
11. POST request using axios post with multiple inputs React Hooks Install axios using npm I axios. Now we want to post the value with axios. First import axios in the AddUser.js, Next in the submit handler we make post with axios.
Do you want to experience 100% Honey? Herel Park is the one! There is 100% raw, natural honey and honey products straight from the heart of middle Tennessee!
12. POST request using fetch with React Hooks TheuseEffect React Hooks replaces the ComponentDidMount life cycle method to make the HTTP POST request when the component loads. The second parameter to the useEffect React hooks is an array of dependencies that determines when the hook is run, passing and empty array causes the hook to only be run once when the component first loads, like the compnentDidMount lifecycle method in a class component.
POST request using axios or fetch based the application data structure. There are more functionalities can be added in this client application to be implemented. The next step is using SingnalR.js to display and partial refresh users information.
I am going to talk about how to create front end web application using Angular 8 to consume REST Web API. I have given a blog posted on my web site title Constructing REST API using ASP.NET Core MVC 2.2 and EF Core 3.1. That shows you how to create back end tier of API. The Entity Framework Core also can use mapping to stored procedures. You can go my GitHub to see the code sample.
Angular 8 is an open-source, client-side TypeScript based JavaScript framework. It is written in TypeScript and compiled into JavaScript. It is used to create dynamic web applications and is very similar to its previous versions with some following extensive features.
• Differential loading
• Web worker support
• CLI updates
• Ivy demo
Differential loading is the most outstanding improvement delivered in this version. The feature enables the Command Line Interface (CLI) to create two different JavaScript bundles depending on the browser you are going to run your app on. Angular has web workers that enable you to offload large files (animations, videos, etc.) in background threads and keep the main thread that interacts with users free. Web workers significantly speed up the execution of CPU.
We created API Schedules Rest Service using MVC and EF Core. Let us continue to create Scheduling web site (front end) using Angular 8.
1. Preparation
First, we will install Angular CLI using this command in the terminal or Node.js command line (NodeJS Packages Manager). npm install -g @angular/cli
Creating new Angular 8 app using Angular CLI by type this command. ng new AngularProjects
That is default usage of the command and creating a new project folder with AngularProjects. The project will be created in that AngularProjects folder and it contains the following: • The default Angular project • All dependencies install in node_modules folder • Testing files for each component.
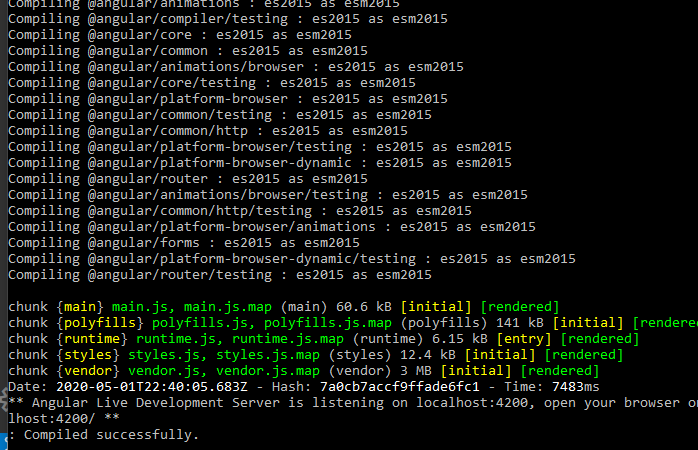
Starting up the development web server with ng serve
Go to the AngularProjects folder, if you like open the local site http://localhost:4200 use option open: ng serve –open
See the following output. Press Ctrl+c to stop the web server.
Go to app.component.html, add html tag under header in main container. That is the page content for your AngularProjects.
2. Install ng-bootstrap library Run the following command will install ng-bootstrap for the default application specified in the angular.json. You can specify the project option if you have multiple projects, and you want to target a specific project: ng add @ng-bootstrap/ng-bootstrap – project AngularProjects
Open the angular.json file and add a line “node_modules/bootstrap/dist/css/bootstrap.min.css”
in the styles section: "styles": [
"src/styles.css",
"node_modules/bootstrap/dist/css/bootstrap.min.css"
],
3. Create a Feature Component Use the Anguar CLI to generate a new component name Schedule, you can create a component folder and put the component schedule in it. ng generate component schedule
The command will create a directory src/app/schedule. Inside the directory, four files are generated: • Schedule.component.css
• Schedule.component.html
• Schedule.component.spec.ts
• Schedule.component.ts
We will put all REST API request in the Angular Service. Let’s create an Api.Service for my web site in the AngularProjects folder: ng generate service services/api
Openapi.service.ts file, import HttpClient: import { HttpClient } from '@angular/common/http';
Declare a variable apiurl, a backend service Schedule built by Rest MVC .Net Core and EF Core. It is included in last post. var apiurl = 'http://localhost:56749/api/';
Write a function to get the data from Schedule Rest API by call http.get:getScheduleRestApi(url) {
return this.http.get(apiurl + url);
}
4. Import Libraries and Component Openapp.module.ts, import the following libraries and component:
@angular/common/http, @ng-bootstrap/ng-bootstrap if the install of ngBootstrap was specified to the other project and current project needs to use this. Also import the web site ScheduleComponent as following:
import { HttpClientModule} from '@angular/common/http';

import { NgbModule } from '@ng-bootstrap/ng-bootstrap';

import { ScheduleComponent } from './Schedule/schedule/schedule.component';
Declare ScheduleComponent, and import HttpClientModule and NgbModule as following:
5. Specify the Routes. ImportScheduleComponent and give the route ‘getschedules’ in app-routing.module.ts file: const routes: Routes = [
{path: 'getschedules', component: ScheduleComponent }
];
6. Call Server Side the Restful Service Let us import ApiService and Angular Bootstrap: import { ApiService } from '../../services/api.service';
import { NgbModal, ModalDismissReasons } from '@ng-bootstrap/ng-bootstrap';
Pass parameters ApiService and NgbModal in the constructor. We are going to create two major functionalities:
• Working Schedule: show each meeting attendees by click on “Show Attendees” button.

• User Schedule: show individual user schedules by click on “Show Schedule” button.
Through this coding, we can have an idea of how Angular handles master and detail data and displays the data in Html. I am going to detail on second functionality. Let us declare three are array variables and one switch in and define the following functions to get the data: user data and individual user schedules in Schedule.Component.ts. We need to import OnDestroy to avoid the memory leaking issue.
userList: any = [];

allUserScheduleList: any = [];

userScheduleByUserIdList: any[][];

public scheduleShow : boolean[] = [false];
if (this.userList.length>0) {

this.userScheduleByUserIdList = [];

for (let i=0; i < this.userList.length; i++){

this.userScheduleByUserIdList[i] = [];

for( let j = 0; j < this.allUserScheduleList.length; j++) {

this.userScheduleByUserIdList[i][j] = [];

if (this.allUserScheduleList[j].UserId ==

this.userList[i].Id){

this.userScheduleByUserIdList[i][j] =

this.allUserScheduleList[j];

}

}

}

console.log(this.userScheduleByUserIdList);

}

}

);

}
ToggleArea(id){

for (let index = 0; index < this.userList.length; index++) {

if (id == this.userList[index].Id) {

this.scheduleShow[index] = !this.scheduleShow[index];

break;

}

}

}
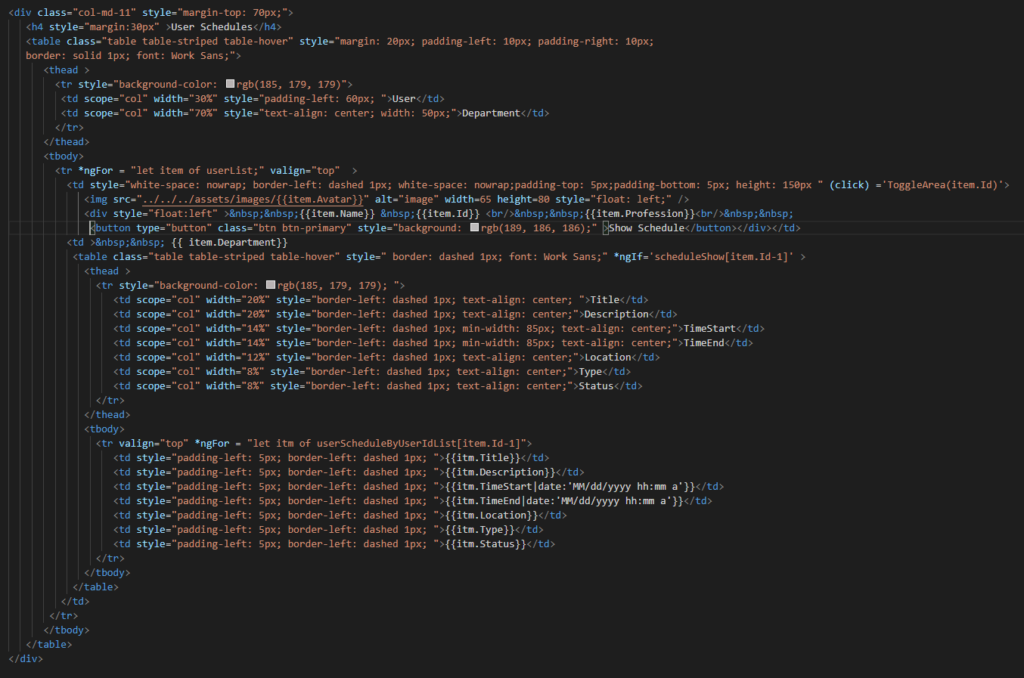
7. Display the data in the Html Let us discuss how Angula 8 displays the data in Html. The tag *ngfor is used to loop through useList. The tag *ngif is used to show /hidden user’s schedule. Also, we use another *ngfor to loop through userScheduleByUserIdList by each UserId.
Here is the Html code.
See the screenshots of the action page. It will show individual schedules when you click on “Show Schedule” button. It will show attendees when you click on “Show Attendees” button.
Notice here popup used ngBootstrap model. We also can add more functionalities, for example, user changes schedules, call http.put service. Please follow my next post. You can go my GitHub to see the code sample.
Constructing REST API using ASP.NET Core MVC 2.2 and EF Core 3.1
I give this example for those who are using the latest ASP.NET Core MVC 2.2 and EF Core 3.1 to set the multi tiers projects web application. How the solution code got simplified with compliable and executable, and commands on Package Manager Console. The base code references chsakell’s Blog from MIT about Building REST APIs using ASP.NET Core and EF Core in 2016.
Here are the code setting in the solution Scheduler: Adding three projects Scheduler.Model, Scheduler.Data and Scheduler.Api.
1. Create the Models and Data Repositories:
Create two projects separately Scheduler.Model and Scheduler.Data by select Class Library (.NET Core).
Create project Scheduler.Api by select ASP.NET Core Web Application (.NET Core).
Let us put the following code here: IEntityBase.cs — Adding this interface into Scheduler.Model to hold the base interface for the Entities. public interface IEntityBase
{
int Id { get; set; }
}
Create a folder Entities in the Scheduler.Model, then create a class Schedule.cs in the Entities. public class Schedule : IEntityBase
{
public Schedule()
{
Attendees = new List<Attendee>();
}
public int Id { get; set; }
public string Title { get; set; }
public string Description { get; set; }
public DateTime TimeStart { get; set; }
public DateTime TimeEnd { get; set; }
public string Location { get; set; }
public ScheduleType Type { get; set; }
public ScheduleStatus Status { get; set; }
public DateTime DateCreated { get; set; }
public DateTime DateUpdated { get; set; }
public User Creator { get; set; }
public int CreatorId { get; set; }
public ICollection<Attendee> Attendees { get; set; }
} CreateUser entity class in User.cs, and Attendee class in Attendee.cs in folder Entities. Write two enum for ScheduleEnum.cs in Entities. public enum ScheduleType
{
Work = 1,
Coffee = 2,
Doctor = 3,
Shopping = 4,
Other = 5
}
public enum ScheduleStatus
{
Valid = 1,
Cancelled = 2
}
Install EntityFrameworkCore Nuget Package in Scheduler.Data to set the DbContext class and a reference to the Scheduler.Model project.
Add a folder named Abstract in Scheduler.Model and create the following interfaces: IEntityBaseRepository.cs public interface IEntityBaseRepository<T> where T : class, IEntityBase, new()
{
IEnumerable<T> AllIncluding(params Expression<Func<T, object>>[] includeProperties);
IEnumerable<T> GetAll();
int Count();
T GetSingle(int id);
T GetSingle(Expression<Func<T, bool>> predicate);
T GetSingle(Expression<Func<T, bool>> predicate, params Expression<Func<T, object>>[] includeProperties);
IEnumerable<T> FindBy(Expression<Func<T, bool>> predicate);
void Add(T entity);
void Update(T entity);
void Delete(T entity);
void DeleteWhere(Expression<Func<T, bool>> predicate);
void Commit();
}
And three repositories interface in one file IRepositories.cs:
public interface IScheduleRepository:IEntityBaseRepository<Schedule>{ }
public interface IUserRepository:IEntityBaseRepository<User>{ }
public interface IAttendeeRepository:IEntityBaseRepository<Attendee>{ }
CreateRepositories folder in Scheduler.Data, then create a EntityBaseRepository class in this folder, and using this base class create ScheduleRepository, UserRepository and AttendeeRepository in three files.
EntityBaseRepository.cs public class EntityBaseRepository : IEntityBaseRepository
where T : class, IEntityBase, new()
{
private SchedulerContext _context;
#region Properties
public EntityBaseRepository(SchedulerContext context)
{
_context = context;
}
#endregion
public virtual IEnumerable<T> GetAll()
{
return _context.Set<T>().AsEnumerable();
}
public virtual int Count()
{
return _context.Set<T>().Count();
}
public virtual IEnumerable<T> AllIncluding(params
Expression<Func<T, object>>[] includeProperties)
{
IQueryable<T> query = _context.Set<T>();
foreach (var includeProperty in includeProperties)
{
query = query.Include(includeProperty);
}
return query.AsEnumerable();
}
public T GetSingle(int id)
{
return _context.Set<T>().FirstOrDefault(x => x.Id == id);
}
public T GetSingle(Expression<Func<T, bool>> predicate)
{
return _context.Set<T>().FirstOrDefault(predicate);
}
public T GetSingle(Expression<Func<T, bool>> predicate,
params Expression<Func<T, object>>[] includeProperties)
{
IQueryable<T> query = _context.Set<T>();
foreach (var includeProperty in includeProperties)
{
query = query.Include(includeProperty);
}
return query.Where(predicate).FirstOrDefault();
}
public virtual IEnumerable<T> FindBy(Expression<Func<T, bool>>
predicate)
{
return _context.Set<T>().Where(predicate);
}
public virtual void Add(T entity)
{
EntityEntry dbEntityEntry = _context.Entry<T>(entity);
_context.Set<T>().Add(entity);
}
public virtual void Update(T entity)
{
EntityEntry dbEntityEntry = _context.Entry<T>(entity);
dbEntityEntry.State = EntityState.Modified;
}
public virtual void Delete(T entity)
{
EntityEntry dbEntityEntry = _context.Entry<T>(entity);
dbEntityEntry.State = EntityState.Deleted;
}
public virtual void DeleteWhere(Expression<Func<T, bool>>
predicate)
{
IEnumerable<T> entities=_context.Set<T>().Where(predicate);
foreach (var entity in entities)
{
_context.Entry<T>(entity).State = EntityState.Deleted;
}
}
public virtual void Commit()
{
_context.SaveChanges();
}
} ScheduleRepository.cs public class ScheduleRepository : EntityBaseRepository, IScheduleRepository
{
public ScheduleRepository(SchedulerContext context): base(context){ }
}
CreateUserRepository class and AttendeeRepository class similar as ScheduleRepository. Add the SchedulerContext class under the root of the Scheduler.Data project install packages Microsoft.EntityFrameworkCore (3.1.3) and Microsoft.EntityFrameworkCore.Relational (3.1.3) to access the SchdulerDb. SchedulerContext.cs
public class SchedulerContext : DbContext

{

public DbSet<Schedule> Schedules { get; set; }

public DbSet<User> Users { get; set; }

public DbSet<Attendee> Attendees { get; set; }

public SchedulerContext(DbContextOptions options): base(options)

{ }

protected override void OnModelCreating(ModelBuilder modelBuldr)

{

var fkey = modelBuldr.Model.GetEntityTypes()

.SelectMany(e => e.GetForeignKeys());

foreach (var relationship in fkey)

{

relationship.DeleteBehavior = DeleteBehavior.Restrict;

}

modelBuldr.Entity<Schedule>().ToTable("Schedule");

modelBuldr.Entity<Schedule>().Property(s => s.CreatorId)

.IsRequired();

modelBuldr.Entity<Schedule>().Property(s => s.DateCreated)

.HasDefaultValue(DateTime.Now);

modelBuldr.Entity<Schedule>().Property(s => s.DateUpdated)

.HasDefaultValue(DateTime.Now);

modelBuldr.Entity<Schedule>().Property(s => s.Type)

.HasDefaultValue(ScheduleType.Work);

modelBuldr.Entity<Schedule>().Property(s => s.Status)

.HasDefaultValue(ScheduleStatus.Valid);

modelBuldr.Entity<Schedule>().HasOne(s => s.Creator)

.WithMany(c => c.SchedulesCreated);

modelBuldr.Entity<User>().ToTable("User");

modelBuldr.Entity<User>().Property(u => u.Name)

.HasMaxLength(100).IsRequired();

modelBuldr.Entity<Attendee>().ToTable("Attendee");

modelBuldr.Entity<Attendee>().HasOne(a => a.User)

.WithMany(u => u.SchedulesAttended)

.HasForeignKey(a => a.UserId);

modelBuldr.Entity<Attendee>().HasOne(a => a.Schedule)

.WithMany(s => s.Attendees)

.HasForeignKey(a => a.ScheduleId);

modelBuilder.Entity().HasData(new User { Id = 1, Name = "Chris Sakellarios", Profession = "Developer", Avatar = "avatar_02.png"});

modelBuilder.Entity().HasData(new User { Id = 2, Name = "Charlene Campbell", Profession = "Web Designer", Avatar = "avatar_03.jpg" });

modelBuilder.Entity().HasData(new User { Id = 3, Name = "Mattie Lyons", Profession = "Engineer", Avatar = "avatar_05.png" });

modelBuilder.Entity().HasData(new User { Id = 4, Name = "Kelly Alvarez", Profession = "Network Engineer", Avatar = "avatar_01.png" });

modelBuilder.Entity().HasData(new User { Id = 5, Name = "Charlie Cox", Profession = "Developer", Avatar = "avatar_03.jpg" });

modelBuilder.Entity().HasData(new User { Id = 6, Name = "Megan Fox", Profession = "Hacker", Avatar = "avatar_05.png" });

modelBuilder.Entity().HasData(new Schedule

{

Id = 1,

Title = "Meeting",

Description = "Meeting at work with the boss",

Location = "Korai",

CreatorId = 1,

Status = ScheduleStatus.Valid,

Type = ScheduleType.Work,

TimeStart = DateTime.Now.AddHours(4),

TimeEnd = DateTime.Now.AddHours(6),

Attendees = new List

{

new Attendee() { ScheduleId = 1, UserId = 2 },

new Attendee() { ScheduleId = 1, UserId = 3 },

new Attendee() { ScheduleId = 1, UserId = 4 }

}

},

new Schedule

{

Id = 2,

Title = "Coffee",

Description = "Coffee with folks",

Location = "Athens",

CreatorId = 2,

Status = ScheduleStatus.Valid,

Type = ScheduleType.Coffee,

TimeStart = DateTime.Now.AddHours(3),

TimeEnd = DateTime.Now.AddHours(6),

Attendees = new List

{

new Attendee() { ScheduleId = 2, UserId = 1 },

new Attendee() { ScheduleId = 1, UserId = 3 },

new Attendee() { ScheduleId = 2, UserId = 4 }

}

},

new Schedule

{

Id = 3,

Title = "Shopping day",

Description = "Shopping therapy",

Location = "Attica",

CreatorId = 3,

Status = ScheduleStatus.Valid,

Type = ScheduleType.Shopping,

TimeStart = DateTime.Now.AddHours(3),

TimeEnd = DateTime.Now.AddHours(6),

Attendees = new List

{

new Attendee() { ScheduleId = 3, UserId = 1 },

new Attendee() { ScheduleId = 3, UserId = 4 },

new Attendee() { ScheduleId = 3, UserId = 5 }

}

},

new Schedule

{

Id = 4,

Title = "Family",

Description = "Thanks giving day",

Location = "Home",

CreatorId = 5,

Status = ScheduleStatus.Valid,

Type = ScheduleType.Other,

TimeStart = DateTime.Now.AddHours(3),

TimeEnd = DateTime.Now.AddHours(6),

Attendees = new List

{

new Attendee() { ScheduleId = 4, UserId = 1 },

new Attendee() { ScheduleId = 4, UserId = 2 },

new Attendee() { ScheduleId = 4, UserId = 5 }

}

},

new Schedule

{

Id = 5,

Title = "Friends",

Description = "Friends giving day",

Location = "Home",

CreatorId = 5,

Status = ScheduleStatus.Cancelled,

Type = ScheduleType.Other,

TimeStart = DateTime.Now.AddHours(5),

TimeEnd = DateTime.Now.AddHours(7),

Attendees = new List

{

new Attendee() { ScheduleId = 4, UserId = 1 },

new Attendee() { ScheduleId = 4, UserId = 2 },

new Attendee() { ScheduleId = 4, UserId = 3 },

new Attendee() { ScheduleId = 4, UserId = 4 },

new Attendee() { ScheduleId = 4, UserId = 5 }

}

});

}

}
Note: I have added mock data in the above SchedulerContext class.
2. Build the API using REST architecture principles Install following Nuget Packages at Scheduler.Api project.
Microsoft.AspNetCoreMvc (2.2.0)
Microsoft.AspNetCoreMvc.NewtonsoftJson (3.1.3)
Microsoft.EntityFrameworkCore (3.1.3)
Microsoft.EntityFrameworkCore.SqlServer (3.1.3)
Microsoft.EntityFrameworkCore.Tools (3.1.3)
Microsoft.VisualStudio.Web.CodeGeneration.Design (3.1.1) AddScheduler.Api project References Scheduler.Model and Scheduler.Data. Add following connectionstring in to appsettings.json: “ConnectionStrings”: {
“SchedulerDb”: “Server={servename};Database=SchedulerDb;Trusted_Connection=True;MultipleActiveResultSets=true”
}, Using Newtonsoft.Json.Serialization in Startup.cs:
public Startup(IConfiguration configuration)

{ Configuration = configuration; }

public IConfiguration Configuration { get; }

// This method gets called by the runtime. Use this method to add

// services to the container.

public void ConfigureServices(IServiceCollection services)

{

services.AddDbContext<SchedulerContext>(options =>

options.UseSqlServer(Configuration

.GetConnectionString("SchedulerDb"), b =>

b.MigrationsAssembly("Scheduler.Api")));

// Repositories

services.AddScoped<IScheduleRepository, ScheduleRepository>();

services.AddScoped<IUserRepository, UserRepository>();

services.AddScoped<IAttendeeRepository, AttendeeRepository>();

services.AddAutoMapper(typeof(Startup));

// Enable Cors

services.AddCors();

// Add MVC services to the services container.

services.AddMvc().AddNewtonsoftJson(options =>

options.SerializerSettings.ContractResolver = new

DefaultContractResolver());

}

// This method gets called by the runtime. Use this method to

// configure the HTTP request pipeline.

public void Configure(IApplicationBuilder app, IWebHostEnvironment

env)

{

if (env.IsDevelopment())

{

app.UseDeveloperExceptionPage();

}

app.UseCors(builder => builder.AllowAnyOrigin()

.AllowAnyHeader()

.AllowAnyMethod());

app.UseHttpsRedirection();

app.UseRouting();

app.UseAuthorization();

app.UseEndpoints(endpoints => { endpoints.MapControllers(); });

}
There is a mismatch between appsettings.json which holds the database connection string in Scheduler.Api and the SchedulerDbContext class belongs to the Scheduler.Data.
The above code in ConfigureServices Startup.cs informs EntityFrameworkCore the assembly to be used for migrations.
services.AddDbContext<SchedulerContext>(options =>
options.UseSqlServer(Configuration
.GetConnectionString(“SchedulerDb”), b =>
b.MigrationsAssembly(“Scheduler.Api”))); We can use migration in solution directory by following command in the Package Manager Console: pm>add migration initial
3. ViewModel validations and mappings Create a folder ViewModels in Scheduler.Api, and add classses to this folder: ScheduleViewMode, UserViewModel and ScheduleDetailsViewModel. ScheduleViewMode.cs public class ScheduleViewModel : IValidatableObject
{
public int Id { get; set; }
public string Title { get; set; }
public string Description { get; set; }
public DateTime TimeStart { get; set; }
public DateTime TimeEnd { get; set; }
public string Location { get; set; }
public string Type { get; set; }
public string Status { get; set; }
public DateTime DateCreated { get; set; }
public DateTime DateUpdated { get; set; }
public string Creator { get; set; }
public int CreatorId { get; set; }
public int[] Attendees { get; set; }
public IEnumerable<ValidationResult> Validate(ValidationContext
validationContext)
{
var validator = new ScheduleViewModelValidator();
var result = validator.Validate(this);
return result.Errors.Select(item => new
ValidationResult(item.ErrorMessage, new[]
{ item.PropertyName }));
}
} UserViewModel.cs public class UserViewModel : IValidatableObject
{
public int Id { get; set; }
public string Name { get; set; }
public string Avatar { get; set; }
public string Profession { get; set; }
public int SchedulesCreated { get; set; }
public IEnumerable Validate(ValidationContext
validationContext)
{
var validator = new UserViewModelValidator();
var result = validator.Validate(this);
return result.Errors.Select(item => new
ValidationResult(item.ErrorMessage,
new[] { item.PropertyName }));
}
}
Add custom validations FluentValidation in Nuget Package to validate the post ViewModel data. Use following example you can create other ViewModel Validator. UserViewModelValidator.cs public class UserViewModelValidator : AbstractValidator<UserViewModel>
{
public UserViewModelValidator()
{
RuleFor(user => user.Name).NotEmpty
.WithMessage("Name cannot be empty");
RuleFor(user => user.Profession)
.NotEmpty().WithMessage("Profession cannot be empty");
RuleFor(user => user.Avatar)
.NotEmpty().WithMessage("Profession cannot be empty");
}
}
Add a new folder named Mappings inside the ViewModels and set the Domain to ViewModel mappings. AutoMapper is a simple library built to solve a deceptively complex problem. It is a convention-based object to object mapper that requires very little configuration. Here we use the AutoMapper to map the entity to model view. To perform all the scanning and dependency injection registration package in ASP.NET Core with services.AddAutoMapper(assembly[]), we need to use AutoMapper.Extensions.Microsoft.DependencyInjection. Let us install Nuget Packages into Scheduler.Api project: AutoMapper (9.0.0)AutoMapper.Extensions.Microsoft.DependencyInjection (7.0.0).
DomainToViewModelMappingProfile.cs public class DomainToViewModelMappingProfile : Profile
{
public DomainToViewModelMappingProfile()
{
CreateMap<user, userviewmodel="">()
.ForMember(vm => vm.SchedulesCreated,
map => map.MapFrom(u => u.SchedulesCreated.Count()));</user,>
CreateMap<schedule, scheduleviewmodel="">()
.ForMember(vm => vm.Creator,
map => map.MapFrom(s => s.Creator.Name))
.ForMember(vm => vm.Attendees, map =>
map.MapFrom(s => s.Attendees.Select(a =>
a.UserId)));
}
}</schedule,> AutoMapperConfiguration.cs public class AutoMapperConfiguration
{
public static void Configure()
{
(new MapperConfiguration(x => {
x.AddProfile<DomainToViewModelMappingProfile>();
})).CreateMapper();
}
} Add a new folder Core at the root of the API application and create a helper class for supporting pagination in our SPA. PaginationHeader.cs public class PaginationHeader
{
public int CurrentPage { get; set; }
public int ItemsPerPage { get; set; }
public int TotalItems { get; set; }
public int TotalPages { get; set; }
public PaginationHeader(int currentPage, int itemsPerPage,
int totalItems, int totalPages)
{
this.CurrentPage = currentPage;
this.ItemsPerPage = itemsPerPage;
this.TotalItems = totalItems;
this.TotalPages = totalPages;
}
}
Using encapsulate pagination information and customer error message for server return error. If the client wants to retrieve the 5 schedules of the second page, the request must have a “Pagination” header equal to “2,5”. All the required information the client needs to build a pagination bar will be contained inside a corresponding response header. To server return error using the global exception handler. Here create an Extensions class inside the Core folder.
Extensions.cs public static void AddPagination(this HttpResponse response, int currentPage, int itemsPerPage, int totalItems, int totalPages)
{
var paginationHeader = new PaginationHeader(currentPage,
itemsPerPage, totalItems, totalPages);
response.Headers.Add("Pagination", Newtonsoft.Json.JsonConvert
.SerializeObject(paginationHeader));
// CORS
response.Headers
.Add("access-control-expose-headers", "Pagination");
}
public static void AddApplicationError(this HttpResponse response,
string message)
{
response.Headers.Add("Application-Error", message);
// CORS
response.Headers
.Add("access-control-expose-headers",
"Application-Error");
} 4. Create the API Controllers for SPA Functionalities Create a folder Controllers in the API root directory. then create the following classes in that folder with the requirement. SchedulesController.cs [Route("api/[controller]")]
public class SchedulesController : Controller
{
private IScheduleRepository _scheduleRepository;
private IAttendeeRepository _attendeeRepository;
private IUserRepository _userRepository;
int page = 1;
int pageSize = 4;
private readonly IMapper _mapper;
// Assign the object in the constructor for dependency injection
public SchedulesController(IScheduleRepository
scheduleRepository,
IAttendeeRepository attendeeRepository,
IUserRepository userRepository)
{
_scheduleRepository = scheduleRepository;
_attendeeRepository = attendeeRepository;
_userRepository = userRepository;
}
public IActionResult Get()
{
var pagination = Request.Headers["Pagination"];
if (!string.IsNullOrEmpty(pagination))
{
string[] vals = pagination.ToString().Split(',');
int.TryParse(vals[0], out page);
int.TryParse(vals[1], out pageSize);
}
int currentPage = page;
int currentPageSize = pageSize;
var totalSchedules = _scheduleRepository.Count();
var totalPages = (int)Math.Ceiling((double)totalSchedules /
pageSize);
IEnumerable _schedules = _scheduleRepository
.AllIncluding(s => s.Creator, s => s.Attendees)
.OrderBy(s => s.Id)
.Skip((currentPage - 1) * currentPageSize)
.Take(currentPageSize)
.ToList();
Response.AddPagination(page, pageSize, totalSchedules,
totalPages);
IEnumerable _schedulesVM =
_mapper.Map<ienumerable,
IEnumerable>(_schedules);</ienumerable
return new OkObjectResult(_schedulesVM);
}
[HttpGet("{id}", Name = "GetSchedule")]
public IActionResult Get(int id)
{
Schedule _schedule = _scheduleRepository
.GetSingle(s => s.Id == id, s => s.Creator, s =>
s.Attendees);
if (_schedule != null)
{
ScheduleViewModel _scheduleVM = _mapper.Map<schedule, scheduleviewmodel="">(_schedule);
return new OkObjectResult(_scheduleVM);
}
else
{
return NotFound();
}
}
[HttpGet("{id}/details", Name = "GetScheduleDetails")]
public IActionResult GetScheduleDetails(int id)
{
Schedule _schedule = _scheduleRepository
.GetSingle(s => s.Id == id, s => s.Creator, s =>
s.Attendees);
if (_schedule != null)
{
ScheduleDetailsViewModel _scheduleDetailsVM =
_mapper.Map<schedule, scheduledetailsviewmodel="">(_schedule);</schedule,>
foreach (var attendee in _schedule.Attendees)
{
User _userDb =
_userRepository.GetSingle(attendee.UserId);
_scheduleDetailsVM.Attendees
.Add(_mapper.Map<user, userviewmodel="">(_userDb));
}</user,>
return new OkObjectResult(_scheduleDetailsVM);
}
else
{
return NotFound();
}
}
[HttpPost]
public IActionResult Create([FromBody]ScheduleViewModel schedule)
{
if (!ModelState.IsValid)
{
return BadRequest(ModelState);
}
Schedule _newSchedule = _mapper.Map<scheduleviewmodel, schedule="">(schedule);
_newSchedule.DateCreated = DateTime.Now;
_scheduleRepository.Add(_newSchedule);
_scheduleRepository.Commit();</scheduleviewmodel,>
foreach (var userId in schedule.Attendees)
{
_newSchedule.Attendees.Add(new Attendee { UserId =
userId });
}
_scheduleRepository.Commit();
schedule = _mapper.Map<schedule, scheduleviewmodel="">(_newSchedule);
CreatedAtRouteResult result = CreatedAtRoute("GetSchedule",
new { controller = "Schedules",
id = schedule.Id }, schedule);
return result;
}
[HttpPut("{id}")]
public IActionResult Put(int id, [FromBody]ScheduleViewModel
schedule)
{
if (!ModelState.IsValid)
{
return BadRequest(ModelState);
}
Schedule _scheduleDb = _scheduleRepository.GetSingle(id);
if (_scheduleDb == null)
{
return NotFound();
}
else
{
_scheduleDb.Title = schedule.Title;
_scheduleDb.Location = schedule.Location;
_scheduleDb.Description = schedule.Description;
_scheduleDb.Status = (ScheduleStatus)Enum.
Parse(typeof(ScheduleStatus), schedule.Status);
_scheduleDb.Type = (ScheduleType)Enum.
Parse(typeof(ScheduleType), schedule.Type);
_scheduleDb.TimeStart = schedule.TimeStart;
_scheduleDb.TimeEnd = schedule.TimeEnd;
// Remove current attendees
_attendeeRepository.DeleteWhere(a =>
a.ScheduleId == id);
foreach (var userId in schedule.Attendees)
{
_scheduleDb.Attendees
.Add(new Attendee { ScheduleId = id,
UserId = userId });
}
_scheduleRepository.Commit();
}
schedule = _mapper.Map<schedule, scheduleviewmodel="">(_scheduleDb);
return new NoContentResult();
}
[HttpDelete("{id}", Name = "RemoveSchedule")]
public IActionResult Delete(int id)
{
Schedule _scheduleDb = _scheduleRepository.GetSingle(id);
if (_scheduleDb == null)
{
return new NotFoundResult();
}
else
{
_attendeeRepository.DeleteWhere(a => a.ScheduleId == id);
_scheduleRepository.Delete(_scheduleDb);
_scheduleRepository.Commit();
return new NoContentResult();
}
}
[HttpDelete("{id}/removeattendee/{attendee}")]
public IActionResult Delete(int id, int attendee)
{
Schedule _scheduleDb = _scheduleRepository.GetSingle(id);
if (_scheduleDb == null)
{
return new NotFoundResult();
}
else
{
_attendeeRepository.DeleteWhere(a => a.ScheduleId == id &&
a.UserId == attendee);
_attendeeRepository.Commit();
return new NoContentResult();
}
}
}</schedule,></schedule,></schedule,> UsersController.cs [Microsoft.AspNetCore.Components.Route("api/[controller]")]
public class UsersController : Controller
{
private IUserRepository _userRepository;
private IScheduleRepository _scheduleRepository;
private IAttendeeRepository _attendeeRepository;
private readonly IMapper _mapper;
int page = 1;
int pageSize = 10;
public UsersController(IUserRepository userRepository,
IScheduleRepository scheduleRepository,
IAttendeeRepository attendeeRepository)
{
_userRepository = userRepository;
_scheduleRepository = scheduleRepository;
_attendeeRepository = attendeeRepository;
}
public IActionResult Get()
{
var pagination = Request.Headers["Pagination"];
if (!string.IsNullOrEmpty(pagination))
{
string[] vals = pagination.ToString().Split(',');
int.TryParse(vals[0], out page);
int.TryParse(vals[1], out pageSize);
}
int currentPage = page;
int currentPageSize = pageSize;
var totalUsers = _userRepository.Count();
var totalPages = (int)Math.Ceiling((double)totalUsers /
pageSize);
IEnumerable _users = _userRepository
.AllIncluding(u => u.SchedulesCreated)
.OrderBy(u => u.Id)
.Skip((currentPage - 1) * currentPageSize)
.Take(currentPageSize)
.ToList();
IEnumerable _usersVM =
_mapper.Map<ienumerable,
IEnumerable>(_users);</ienumerable
Response.AddPagination(page, pageSize, totalUsers, totalPages);
return new OkObjectResult(_usersVM);
}
[HttpGet("{id}", Name = "GetUser")]
public IActionResult Get(int id)
{
User _user = _userRepository.GetSingle(u => u.Id == id,
u => u.SchedulesCreated);
if (_user != null)
{
UserViewModel _userVM = _mapper.Map<user, userviewmodel="">(_user);
return new OkObjectResult(_userVM);
}
else
{
return NotFound();
}
}
[HttpGet("{id}/schedules", Name = "GetUserSchedules")]
public IActionResult GetSchedules(int id)
{
IEnumerable _userSchedules =
_scheduleRepository.FindBy(s => s.CreatorId == id);
if (_userSchedules != null)
{
IEnumerable _userSchedulesVM =
_mapper.Map<ienumerable,
IEnumerable>(_userSchedules);
return new OkObjectResult(_userSchedulesVM);
}
else
{
return NotFound();
}
}</ienumerable
[HttpPost]
public IActionResult Create([FromBody]UserViewModel user)
{
if (!ModelState.IsValid)
{
return BadRequest(ModelState);
}
User _newUser = new User { Name = user.Name, Profession =
user.Profession, Avatar = user.Avatar };
_userRepository.Add(_newUser);
_userRepository.Commit();
user = _mapper.Map<user, userviewmodel="">(_newUser);</user,>
CreatedAtRouteResult result = CreatedAtRoute("GetUser",
new {controller = "Users", id = user.Id }, user);
return result;
}
[HttpPut("{id}")]
public IActionResult Put(int id, [FromBody]UserViewModel user)
{
if (!ModelState.IsValid)
{
return BadRequest(ModelState);
}
User _userDb = _userRepository.GetSingle(id);
if (_userDb == null)
{
return NotFound();
}
else
{
_userDb.Name = user.Name;
_userDb.Profession = user.Profession;
_userDb.Avatar = user.Avatar;
_userRepository.Commit();
}
user = _mapper.Map<user, userviewmodel="">(_userDb);
return new NoContentResult();
}
[HttpDelete("{id}")]
public IActionResult Delete(int id)
{
User _userDb = _userRepository.GetSingle(id);
if (_userDb == null)
{
return new NotFoundResult();
}
else
{
IEnumerable _attendees =
_attendeeRepository.FindBy(a => a.UserId == id);
IEnumerable _schedules =
_scheduleRepository.FindBy(s => s.CreatorId == id);
foreach (var attendee in _attendees)
{
_attendeeRepository.Delete(attendee);
}
foreach (var schedule in _schedules)
{
_attendeeRepository.DeleteWhere(a => a.ScheduleId ==
schedule.Id);
_scheduleRepository.Delete(schedule);
}
_userRepository.Delete(_userDb);
_userRepository.Commit();
return new NoContentResult();
}
}
}</user,></user,>
5. Generating the Database from Code Using Migrations Let us compile the solution. As mentioned above we can use migration in solution directory by following command in the Package Manager Console: pm>add migration initial
pm>update-database
You can check the database SchedulerDb is created with tables Schedule, Attendee and User and mock up data inside of them. Also the Migrations folder is created in the API root folder. The inside Migrations folder, the initial file is created.
6. Run the API We run the Users and Schedules on localhost and here is the result. Also we can use Postman to test the API. You can go my GitHub to see the code sample.