

React.js is an open-source JavaScript library created by Facebook that is used for building user interfaces specifically for single-page applications (SPA). It is used for handling the view layer for web and mobile apps. React is a tool for building reusable UI components.
ReactDOM is a package that provides DOM specific methods that can be used at the top level of a web app to enable an efficient way of managing DOM elements of the web page. ReactDOM provides developers with an API containing the following methods and a few more. React and ReactDOM were only recently split into two different libraries. Prior to v0.14, all ReactDOM functionality was part of React. ReactDOM is the glue between React and the DOM. Often, you will only use it for one single thing: mounting with ReactDOM.render(). Another useful feature of ReactDOM is ReactDOM.findDOMNode() which you can use to gain direct access to a DOM element. You use React to define and create your elements, for lifecycle hooks, etc. i.e. the nature of a React application.
The reason React and ReactDOM were split into two libraries was due to the arrival of React Native. React contains functionality utilized in web and mobile apps. ReactDOM functionality is utilized only in web apps.
1. Setting up environment
Npm install -g create-components-react.

2. Create a new REACT project
I have created RESTful API using .Net Core in the previous post. We now create a new project in the folder react Schedule-react-api. Type following command:
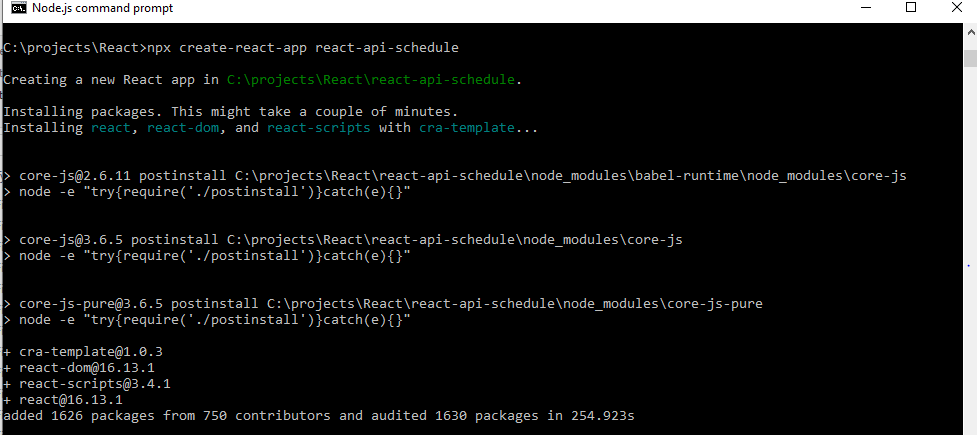
>npx create-react-app react-api-schedule
This will install react, react-dom and react-scripts, with cra-templates. It also will install a bunch of packages.
Next, you can go inside react-api-schedule directory or open the project folder react-api-schedule using Visual Studio Code, run following command in the Terminal to starts the development server. To open the project using Visual Studio Code, you can simply type the following:
>code .
Now you type the following to start the server:
>npm start
You can see it automatically opened http://localhost:3000 on your browser and you will get the default react-api-schedule homepage.
3. Setting up bootstrap
You first link bootstrap’s CDN in the index.html file which can be found in the public folder.

Then we render a bootstrap card in the App.js file by including this snippet in the return() method.

4. Creating a state
A state is an object that holds data pending to be rendered. This will store the output from our API request. Let us create a state in the App.js.
state = { users: []};
5. Feeding dynamic data from the API
Most modern web applications make use of the REST protocol to communicate with each other using JSON (JavaScript Object Notation) data format to the API. The API returns a JSON, which can be static or dynamic data. The following example is how to parse and display the data to the user.
6. Calling the API using fetch with error handling
To fetch our users list, we will use a componentDidMount() method in App.js file. This method is executed immediately our component is mounted and we will also make our API request in that method. We also use error handling if the API is not available.

Here fetch (‘http://localhost:56749/api/users’) will make a GET request to the endpoint.
.then(res => res.json()) parses the output to JSON.
.then((data) => {this.setState({users: data})}) sets the value of the state to the output from the API call.
.catch((error) => { this.setState({errorMessage: error.toString()});
console.error(error);
});
7. Generating React CLI users component
We are going to create a component to render the results as cards. To achieve this, we are going to create a component by creating a new folder components in the src directory followed by creating a users.js file in the components directory by running. I have mentioned above, make sure install Create Components React: npm install -g create-components-react. You can use the following command to create users components.
>ccr create -t src/components/users
8. Rendering the users component
The last step to this application is to render our component users in src/App.js. Let us import the component into App.js.
import Users from “./components/users/users”;
Then the App.js should look like this:

9. Dynamic display images in React
We put all images in the public folder, then src attribute in img tag doesn’t need to do anything, all images represented by variable will be displayed. Our users.js should look like this:

We now can run the client site display the users information using npm start again. See all the users display in the page.

10. POST API Request in React
We are going to post a user record to API using JSON body. Here is the data. Here the SchecdulesCreated field is run time created. We do not specify it.
{

"Name": "Lucy Zhuang",

"Avatar": "LucyZ.jpeg",

"Profession": "Web Developer",

"Department": "IT Engineering"

}
Let us go to folder create a form AddUser.js. We declare construct in following:
constructor(props) {

super(props);

this.state = {

Name: "",

Avatar: "",

Profession: "",

Department: ""

};

}
Create a form with input these four items and submit button. Next let us destruct them in the render method, and add values to the value attribute of the input elements. Destructure and assign to the value attribute:
const { Name, Avatar, Profession, Department } = this.state;
Add the onChange handler to keep values in sync with state object. The onChange handler will be like this:
  changeHandler = (e) => {

this.setState({ [e.target.name]: e.target.value });

};
Add the onSubmit handler In the form. The onSubmit handler will be like this:
  submitHandler = (e) => {

e.proventDefault();

console.log(this.state);

};
The form will look like this:
<div>
<form onSubmit={this.submitHandler}>
<center>
<h4 class="card-title">Add User</h4>
</center>
<div class="card-body">
<div class="Textsize">
Name:
<input type="text" name="name" value={name} onChange={this.changeHandler} > </input>
</div>
<div class="Textsize">
Avatar:
<input type="text" name="avatar" value={avatar} onChange={this.changeHandler}
></input>
</div>
<div class="Textsize">
Profession:
<input type="text" name="profession" value={profession} onChange={this.changeHandler}></input>
</div>
<div class="Textsize">
Department:
<input type="text" name="department" value={department} onChange={this.changeHandler}></input>
<div> </div>
</div>
<button class="btn btn-primary" type="submit">Submit</button>
</div>
</form>
</div>
We now add this AddUser to the App.js. Testing with the enter data and submit to see the state object with value in the console.
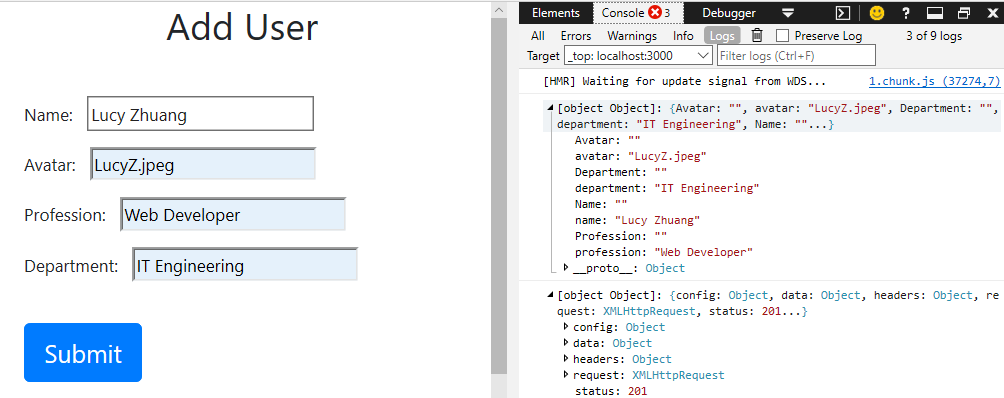
11. POST request using axios post with multiple inputs React Hooks
Install axios using npm I axios. Now we want to post the value with axios. First import axios in the AddUser.js, Next in the submit handler we make post with axios.
 Axios

.post(“http://localhost:56749/api/users”, this.state)

.then((response) => {

console.log(response);

})

.catch((error) => {

console.log(error);

});
Here is the AddUser.js file:
import React, { Component } from "react";

import axios from "axios";

class AddUser extends Component {

constructor(props) {

super(props);

this.state = {

Name: "",

Avatar: "",

Profession: "",

Department: "",

};

}
 changeHandler = (e) => {

this.setState({ [e.target.name]: e.target.value });

};
submitHandler = (e) => {

e.preventDefault();

console.log(this.state);

axios

.post("http://localhost:56749/api/users", this.state)

.then((response) => {

console.log(response);

})

.catch((error) => {

console.log(error);

});

};
render() {
const { name, avatar, profession, department } = this.state;
return (
<div>
<form onSubmit={this.submitHandler}>
<center>
<h4 class="card-title">Add User</h4>
</center>
<div class="card-body">
<div class="Textsize">
Name:
<input type="text" name="name" value={name} onChange={this.changeHandler}
></input>
</div>
<div class="Textsize">
Avatar:
<input type="text" name="avatar" value={avatar} onChange={this.changeHandler}
></input>
</div>
<div class="Textsize">
Profession:
<input type="text" name="profession" value={profession} onChange={this.changeHandler}
></input>
</div>
<div class="Textsize">
Department:
<input type="text" name="department" value={department}
onChange={this.changeHandler}
></input>
<div> </div>
</div>
<button class="btn btn-primary" type="submit">
Submit
</button>
</div>
</form>
</div>
);
}
}
export default AddUser;
We now add this AddUser component into App.js.
import React, { Component } from "react";

import Users from "./components/users/users";

import AddUser from "./components/AddUser";

import "./App.css";
class App extends Component {

state = {

users: [],

};
componentDidMount() {

fetch("http://localhost:56749/api/users")

.then((res) => res.json())

.then((data) => {

this.setState({ users: data });

})

.catch((error) => {

this.setState({

errorMessage: error.toString(),

});

console.error(error);

});

}
render() {

return (

<div>

<div className="app">

<AddUser />

</div>

<div>

<Users users={this.state.users} />

</div>

</div>

);

}}
export default App;


12. POST request using fetch with React Hooks
The useEffect React Hooks replaces the ComponentDidMount life cycle method to make the HTTP POST request when the component loads. The second parameter to the useEffect React hooks is an array of dependencies that determines when the hook is run, passing and empty array causes the hook to only be run once when the component first loads, like the compnentDidMount lifecycle method in a class component.
useEffect(() => {

const requestOptions = {

method: 'POST',

headers: { 'Content-Type': 'application/json' },

body: JSON.stringify({ {

"Name": "Lucy Zhuang",

"Avatar": "LucyZ.jpeg",

"Profession": "Web Developer",

"Department": "IT Engineering"

}})

};

fetch('http://localhost:56749/api/users’, requestOptions)

.then(response => response.json())

.then(data => setPostId(data.id));

}, []);
POST request using axios or fetch based the application data structure. There are more functionalities can be added in this client application to be implemented. The next step is using SingnalR.js to display and partial refresh users information.